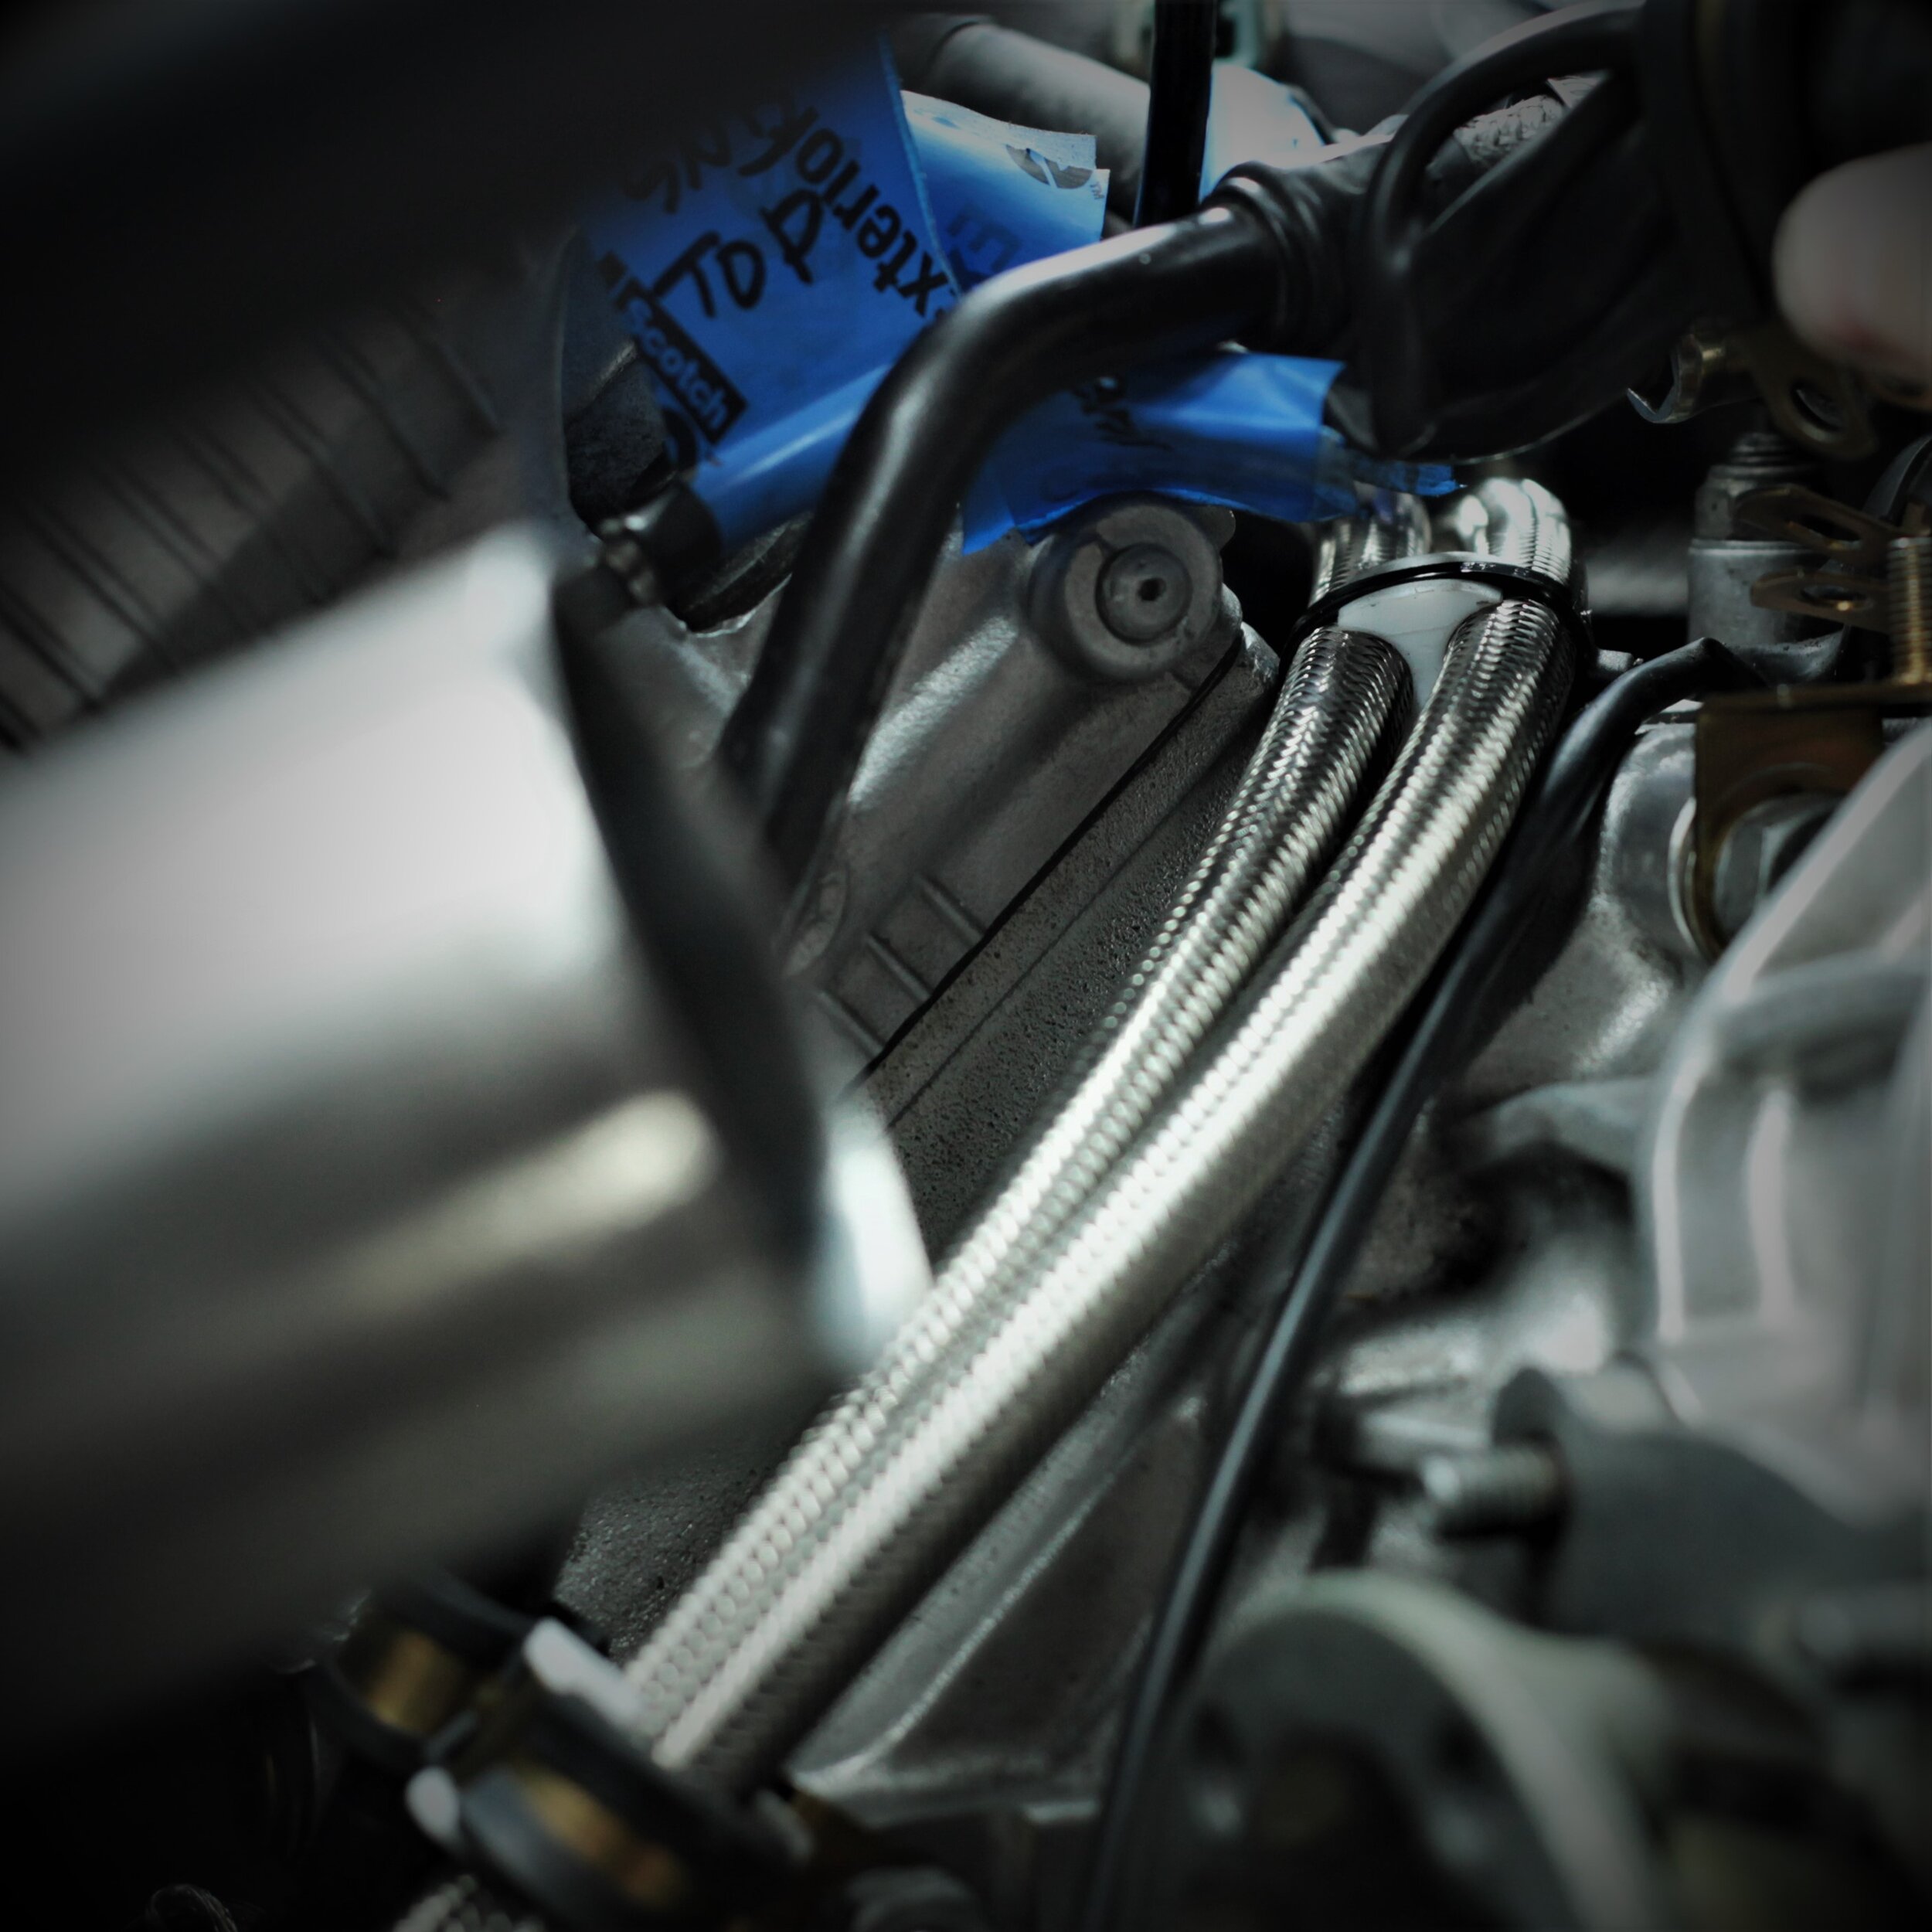
The back end of the engine needed a bit of attention, not typically considered during a major service. There was a characteristic “rattle” when I shut down the engine when hot, which was likely the dual mass flywheel asking for a re-grease. Additionally there were not one but two small oil leaks coming from the transmission : one from the right side cover of the transmission, and another recently developed from the braided stainless steel oil lines running to the oil cooler. The cause of the oil line failure was incorrect routing of the lines, allowing the lines to cross over one another, thereby causing the braided steel to effectively hacksaw through one another! I’m glad I caught it when I did because this was about to deteriorate very rapidly.
It seems that the re-greasing of the flywheel was well timed because I simply purchased the convenient and affordable kit from MD clutches, which is sadly no longer available due to the closure of the company. As of this writing it appears that some vendors are starting to sell the special Kluber grease in the appropriate size, and in some cases the kit which includes the orings, and replacement screws. The procedure is well explained on Youtube video posted by MD Clutches for 348, it was quite straightforward for the 355 (there are indeed some differences between the 348 and 355 flywheels). The removal of the inner facing bearing for the 355 required a bearing puller to get behind it for removal to gain access to the snap ring. The process is surprisingly straight forward. I unfortunately had a damaged SD card in my camera, therefore have no photos of the interior of the damper.
The right side cover was an easy fix, a simple re-application of a FIPG (Form In Place Gasket), I use Hondabond for the job. The trick here is at that the cover will not come off unless the engine is out of the sub-frame, so this is a task I did not want to miss what I had the sub frame off already for other reasons.
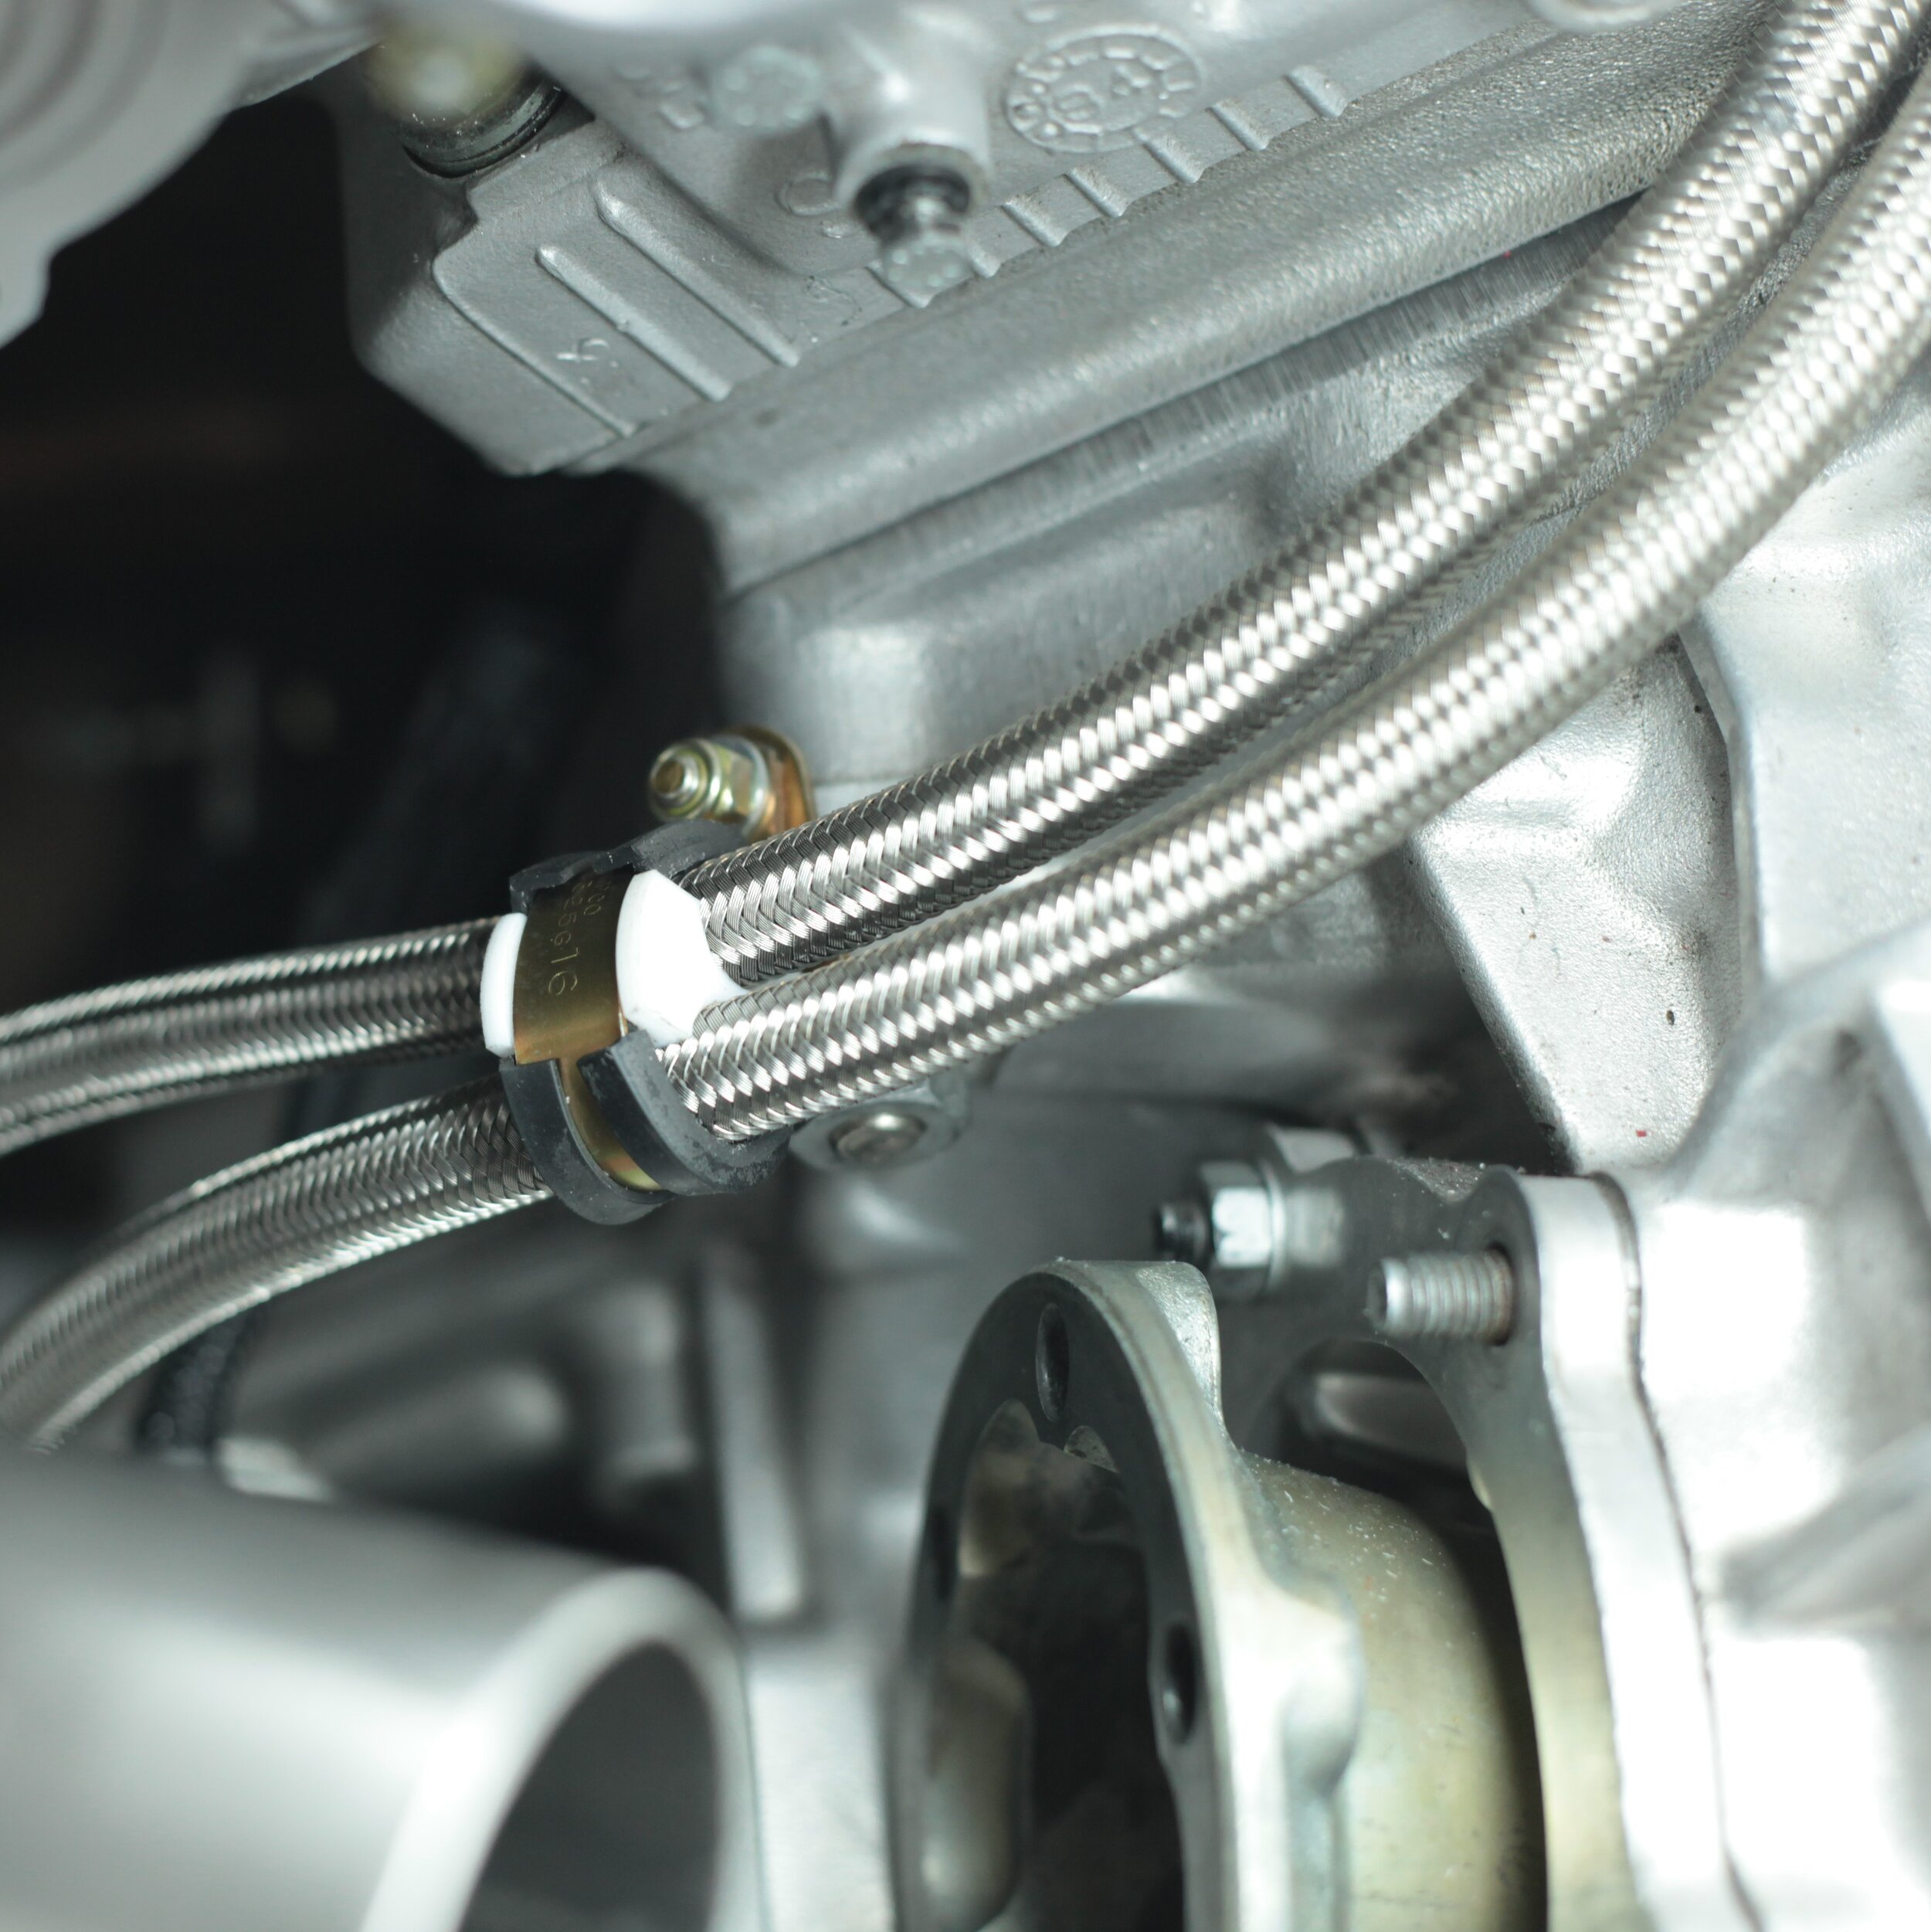
The oil cooler lines clearly needed to be replaced, as the steel braid was broken, and the inside liner has a small puncture. I was fortunately able to find some used oil lines in good condition. Of course I was very conscious of the routing of the lines careful to ensure that they were not touching and were adequately fixed via the clamp. I was not really satisfied with the placement to be honest, so I fabricated some seperators just to be safe. Seems easy enough to add a spacer in the P-Clamps , but in fact it proved to be rather difficult because there is very little room to squeeze the p-clamp between the CV heatshield and the cylinder head, as there is as the oil vent return line with bracket in the same space.
Pro Tip : I would highly recommend having a look at the condition of oil lines when doing the major, as it seems quite difficult to avoid them from contacting one another as the make the bend as they enter the “V” to connect to the oil cooler. One the braided lines start rubbing together, it does not take long for them to saw into one another.
One of the “while you are in there” items I did was replace the output shaft seals, which required making a nifty tool to install the seals. Having recently acquired some skills on a lathe, it is funny how “exciting” it is when you run into a task that requires fabrication of a new tool. Those who make tools will know what I mean.